How to seal a crack in pottery. What is needed for gluing porcelain and ceramic dishes Why marriage occurs
Ceramic products are popular all over the world. High quality and aesthetic appearance are the key to such success. As with any other material, ceramic defects may occur. It is important to know how to determine the presence of a defect and, if possible, get rid of it.
Why marriage occurs
The reasons why certain flaws in finished dishes occur can be divided into three groups. The error occurs at various stages of processing: the formation of a shard, glazing, decoration.
Defects at the procurement stage
The basis of ceramic utensils is a mixture of clay (kaolin) and impurities. The preparation of the clay mass is followed by the formation of the object. The main errors that occur at the primary stage are expressed in:
- Deformations that in most cases can be seen with the naked eye.
- Bubbles. "Acne" is a consequence of a chemical reaction during hardening of the crock. Gas is released later than necessary, forming cavities under the burnt layer.
- Holes on the bottom and/or edges of the product.
- Incorrect attachment of functional parts (handles, spout, etc.)
- The mark left by other utensils when they come into contact while the clay is being hardened.
- Changes in the transparency of porcelain and the whiteness of the workpiece.
Marriage during glazing of the product
Goods with defective glazing are more common, since it is quite difficult to find minor flaws. To purchase high-quality dishes, you should pay attention to:
Cracks under the glaze layer indicate violations during drying and firing. Weak points are the attachment zones of the handles, legs. The defect reduces the service life of the product, makes it unhygienic.
Enamel chipping occurs when using a low-quality coating composition or when the rules for storing and transporting goods are not followed.
Seals on the surface of the product are visible at the edges. Such a marriage of glaze does not underestimate the characteristics of the product, but it affects the appearance.
In pottery, there is the word "cek" - thin hair-like cracks in ceramics. Dishes with such a change are not hygienic and often serve for a short time. Due to the leakage of the enamel, moisture is absorbed into the clay composition, accelerating the destruction of the product. Goods made of faience and majolica are more often subjected to ceca.
Detachment of the edge of a dish occurs when the shard and glaze expand unevenly during firing. Bald spots are formed when the workpiece is not sufficiently cleaned of dirt before applying enamel.
Chips, discoloration, cracks in ceramic dishes and many other flaws that occur at the first stages do not favorably affect the quality, hygiene and service life of the goods.
Decor defects
Flaws in appearance do not affect the operation process. decor defects include scratches, bubbling paint, fading, blots and other shortcomings.
Repair of defective ceramics
A broken or defective item can be repaired by yourself. Depending on the specific defect, restoration occurs by:
1. Bonding broken parts of an object.
2. Filling chips and cracks on ceramic dishes.
Repairing ceramics with your own hands is a painstaking task that requires care and accuracy. In order to fix a broken product, you need to decide which glue to use. One option is to purchase a special mixture in the store for gluing porcelain and ceramics. The second way is to cook the composition of the glue at home.
Porcelain and ceramic products during repair require different compositions of adhesive. For ordinary products, super-glue is used: Monolith, Super-glue, Strength and others. Suitable for porcelain - STANGE, RAPID, BIZON epoxy, etc. Universal remedy - Porcelan Potch. It is not always safe to use utensils treated with chemicals if they are exposed to heat. Food-grade glue has a safer composition.
How to make glue at home
Ingredients: super - glue or other effective, one bag of baking powder for dough (another powder dye), wax, palette knife.
Repair of pottery with a prepared composition
- Using wax, fix the broken parts on the inside of the object. A wax axis should form, on which the fragments hold.
- Lubricate the cleavage points with glue and press firmly against each other, recreating integrity.
- Restore broken pottery step by step.
- If a part is not found, replace it with plasticine or a palette knife. Sculpt the missing object and cover it with a paste of glue and dye. If a piece is missing in the middle of the structure, rub a palette knife or gypsum into the cavity.
- If, after assembling large parts, it turned out that a network of cracks or a small chip is visible on the ceramics, prepare the composition. It is necessary to mix the baking powder and glue until a whitish color is formed. A similar technique is suitable for porcelain.
- Gently distribute the mass in the cavity.
- Using a hair dryer, melt the wax frame (after drying) and wash the product.
You can glue the fragments with super glue or any other yourself:
- Prepare the broken dishes for work by collecting all the fragments.
- Wipe the edges with acetone or other degreaser.
- Spread the adhesive evenly over the fracture site and allow to dry.
- Re-grease the edges and fix the parts.
- It is not necessary to form the object completely. The process should be gradual - after gluing a few fragments, they need to be allowed to dry.
- If there is an opportunity and desire, the restored area can be glazed.
How and with what to close a crack in earthenware
Marriage of ceramic products may not always manifest itself clearly. Minor flaws are easy to miss when buying. Over time, it is possible for cracks in the ceramic to become visible.
For restoration, you will need glue and pigment to match the color of the dishes (for white - baking powder, titanium white). Mix glue and coloring powder. Degrease the product with acetone. Apply the prepared paste with a cotton swab. Wipe off excess from frosting. If necessary, after drying, use an ink eraser. Cover with glaze.
Ceramic tableware must be of high quality and not defective. It is not recommended to use the dishes if the ceramic is cracked or there are other flaws in the glaze. Broken or defective, but your favorite thing can be restored. Repair of ceramic dishes by force to do it yourself or contact the master. And if you want to learn how to create high-quality dishes with your own hands, we suggest visiting the Kolokol pottery school.
Cracks in unfired ceramics are one of the common troubles that happen to novice ceramists, although no one is immune from their occurrence.
Remember that clay shrinks as it dries. So rule number 1
:Do not add water or soft clay to the crack! The water will cause the clay to expand and make you think you've repaired the crack, but you haven't. When the product dries, the clay will shrink and the crack will only get worse. If a crack appears on your product, show the teacher and discuss the possibilities of its correction. Try to find out why the crack appeared. Perhaps you added soft clay to hard clay, which caused the soft clay to dry out and shrink more? Have you pressed the joint well? Was the joint too thick?
So, how do you get rid of cracks in dried ceramics?
Method 1. Dry clay grout
If a small crack appears in a dry piece and the crack cannot be seen to have been caused by a deforming force, the easiest way to repair is to simply rub some dry ground clay into the crack before scrap firing. This will not connect the clay, but after scrap firing, the product can be covered with liquid glaze and the crack will not be visible.
Method 2. Sugar clay
To fill a wide crack in an almost dry item, take a small amount of clay that has dried and crumbled. Add the same amount of powdered sugar and mix with your fingers. Sugar will soften the clay and give it plasticity. Clean out the crack, moisten the edges of the crack with a little vinegar and add the sugar clay. Good powdered sugar imparts more plasticity than water, and when dried, sugar clay will shrink much less than wet clay.
Method 3. Vinegar
If you have a small part of your product broken off and the fault line is even, try vinegar. Apply a small amount of vinegar to the crack and join together. The idea is that the clay softens with the vinegar without absorbing too much water.
Method 4. Paper clay
This method is suitable for large cracks in an almost dry product. It can be used in place of sugar clay if you don't plan on icing it later. Put a small amount of toilet paper in a jar, fill with hot water and grind with a blender until smooth. Drain excess water. Stir dry clay with a blender in another jar. Mix 2/3 clay mass and 1/3 paper mass. It may be necessary to dry the resulting mixture on a plaster board. Clean out the crack, dampen the edges with vinegar, and fill with paper clay. Use this paper clay dry for cracks and liquid paper clay for joining seams.
Here on this site they give advice on repairing cracks in Moroccan Tagine (the same method
applies to all types of pottery) :
*** "If the crack is on the inside of the Tagine, pour enough milk into the Tagine to cover all the cracks. Put the Tagine over medium heat, bring the milk to a boil and continue to cook until half of the milk has evaporated. Let cool for 12 hours .Wash Tagine and dry well.
If the crack is on the outer (bottom) side - place the Tagine in a large pan or other container so that the base of the Tagine fits in this container, pour milk into it and cook this milk until its amount has evaporated by half. Then cool for 12 hours, wash and dry" ***
And here is what is advised on this site "How to cure Mexican pottery":
*** "Your pot cracks are easy to repair; just brush the cracks with beaten egg white and place in a warm oven for a minute or two, the egg white will harden as strong as glue and your cookware will be as good as new. (Better than new 'cause seasoned"
*** (there is also advice on how to get rid of lead additives in the glaze of the pot - THIS IS IMPORTANT!)
Here on this site is also a very original way to repair cracks in ceramic dishes http://theartfulcrafter.com/blog/repairs-two.html
Here on this site http://www.ehow.com/how_12151413_repair-clay-roasting-pot.html also describe in some detail how to repair cracks by boiling milk.
O! And on this site from Bosnia "What to do with this dish", the author suggests using a mixture of sugar and flour
From myself: I would take rice flour (if possible), but in order to remove the burnt layer, I would not scrape it with a knife, because after metal scraping, microcracks can form in the pot, which then turn into large cracks. If my food burns in a clay pot, it is best to wet the burnt place with water and pour a thick layer of salt on it. Let it stand for several hours and try to scrape it off with a wooden spoon or spatula. If this does not help, then add enough water to this salt so that it fills a quarter of the volume of your vessel. Heat slowly, and then add another tbsp. a spoonful of drinking soda. The reaction of salt with soda miraculously softens this burnt crust and it will be easy to scrape it off with a wooden spatula. I discovered this method recently, since I have never burned anything. .. And then such a sin happened, but ... the eyes are afraid, the brains think, but the hands do.
Cracks are the most annoying thing in ceramics and can be frustrating for all novice ceramists, but it is enough to get a little educational program to make your ceramic path much easier. In this article we will talk about the cracks that form in dry products before the first firing during drying.
Where? Why me?
- First of all, cracks can form due to uneven wall thickness. If the bottom is 2 times thicker than the walls, stress is created in the shard due to the fact that one part of the product dries faster than the other and a crack is formed, which is very difficult to cope with.
- Fast/improper drying. If you put the product to dry in a warm place near the oven or in a draft, then the product is very likely to crack. How to equip the right place for drying.
- Poorly attached parts. Handles, spouts and grips that are not additionally reinforced with clay crack very often, so lay each piece with clay sausage, which needs to be well lubricated.
- Poor quality / unsuitable weight. Clays are oily or lean. "Bold" called clay with high ductility. When soaked, the dough made from such clay gives a tactile sensation of a fatty substance: shiny, slippery and practically free of impurities. In this case, the so-called “leaning” substances are added to solutions from such clay: “lean” clay, sand or fireclay chips. But the reverse situation also happens - the product cracks due to too “skinny” clay. Such a material is non-plastic or low-plastic, rough to the touch, has a matte surface and easily crumbles even with a simple finger pressure. In this case, it is necessary to add fatter clay to the “lean” clay or use other additives that increase the fat content of the solution, for example, feldspar or glycerin.
- While sculpting, you add too much water. The surface of the product is often covered with a network of small cracks if it is abundantly watered during modeling. Wipe the product properly with a sponge before drying, both after hand-sculpting and after the potter's wheel.
How to avoid cracks in ceramics?
If you follow all the “safety rules” when molding the product, such as: make the walls uniform in thickness, check that the bottom of the product is not heavy, lubricate the parts well, strengthen the handles, do not add a lot of water when sculpting. It is also important to be very careful about drying, to equip a good place, to carefully monitor each product and “not rush” it, then everything should be fine.
What to do if a crack in the product still appears?
Assess the scale of the situation. If this is a small crack on a huge product that you have been poring over for a week, then you can compete for it. If you are just a student and a huge crater has appeared on your first-second-third student plate (yes, we know that they are the most beautiful), then leave it, spend this clay and time on something more perfect and accept the experience with gratitude.
How to fight?
If you decide to declare war on the crack, we have a recipe. By intuition, the first thing all beginners take is water and begin to cover up the wounded place with it, and so, I’ll get ahead of you: this is by no means necessary. Because of the water, the clay swells and increases in volume, you will already think that you got rid of the crack by covering it, but it wasn’t there, it will not be slow to return with renewed vigor when the clay dries and shrinks. What then to do?
- Wet the crack with vinegar. Clay softens with vinegar, but does not absorb much moisture.
- It is necessary to scratch the place of the crack and around with a pin or pottery needle in different directions.
- Fill the crack with a special compound: 1 part dry clay (with which you work): 1 part kaolin. And smooth the place with a "kidney" or a plastic card. Alumina or small pieces of toilet paper can be added to the composition of the healing mixture.
But it is worth considering that sometimes it happens that you did everything right, but still something went wrong and a crack appeared. Well, ceramics is always not only in our hands, but also in the hands of the ceramic gods, we should not forget about this. Never be upset because of failures, because they give us the most valuable thing in our business - experience.
Good luck with your firing
Always yours
Terracotta Ceramics
Washing with warm soapy water  Whitening a crack with a compress
  Warming up with boiling water and dismantling the old gluing
  Removing traces of previous gluing
  Applying glue to the surface of the chip
  Fixing the glued fragment
  Removing exposed adhesive
  Waxing for mold making
  Removal of the finished, frozen wax mold
  Filling the mold with porcelain-like mass
  Sanding the cast piece with sandpaper
  Restored tinting
wrought product 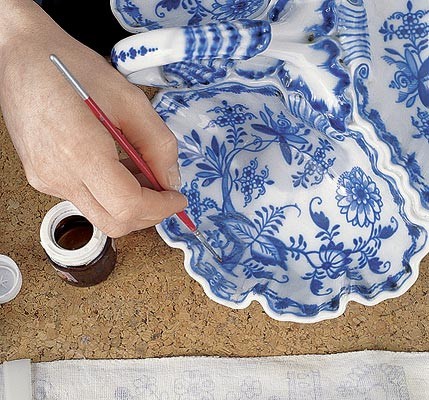 Preservation of new fragments with varnish
  Mastication of small chips along the edges
  Sanding a fragment with a needle file

"... The fragments lay on the floor illuminated by the setting sun, it seemed that a playful breeze swept them away from each other, and I did not want to believe that what was my mother's favorite cup last night, even this morning, turned into blue porcelain petals. .." - who does not remember the sad story about the blue cup, told by Arkady Gaidar. The feeling of a hopeless, irreparable loss mingled in my memory with a childish fear of broken dishes. This story, of course, would have ended quite differently if it happened today and if its heroes had the latest issue of our magazine.
Mom's favorite blue cup would no doubt be restored, so much so that mom would hardly notice anything special. Dishes break at all times - their fragments are either hastily thrown away or clumsily glued together with BF glue.
Now we will talk about the restoration of porcelain according to all its classical rules.
First of all, let's preempt restoration extremists - if you are a happy owner of Meissen or Gardner porcelain, moderate your restorative ardor and reassure yourself that you really have a museum exhibit at your disposal, which can only be entrusted to a highly qualified specialist.
Our advice refers specifically to the "blue cups", that is, to those vases, figurines, teapots and cups dear to the heart and memory, which, nevertheless, do not have a museum or collection value. Our teacher in such a responsible matter as the restoration of porcelain was Sergei Bobrov, the most famous Moscow restorer. He gained his professional experience while working at the All-Russian Artistic Research and Restoration Center named after V.I. I. Grabar and the museum-estate of Tsaritsyno.
Relating to a narrow, select circle of elite restorers in Russia, the master has a high professional reputation among colleagues, collectors and antique dealers. His works adorn private and state museum collections, they were also presented at the largest exhibition "250 Years of Russian Porcelain" in the State Tretyakov Gallery.
The restorer's workplace should have natural daylight, which is especially important when tinting and reconstructing porcelain. It would be nice to protect the table with cork or any other elastic coating, which, in the event of an object falling, will weaken the blow. You should pay attention to the fact that all the actions that you perform and their consequences must be correctable, that is, what professionals call the reversibility of the process. In no case, even with the best of intentions, you can not drill, grind, scratch the original.
Let us consider the restoration process in detail using the example of the restoration of a broken porcelain cabinet. First of all, the object is carefully examined; cracks, chips, places of old gluing come to light. Then, depending on the nature and extent of damage, a restoration plan is determined, that is, the order and sequence of restoration work. If the product is broken, you need to try to combine its pieces without gluing, find out the possibility of their coincidence, identifying the most difficult places.
Next, you need to wash the product in hot (50-600 water), using any soap with a low alkali content, it can be, for example, ordinary baby soap. Dishwashing detergents, soda are not suitable for this, as they can contribute to leaching or peeling of the glaze. Washing should be quite gentle - instead of a brush, it is better to use a bristle brush or a shaving brush.To remove contaminants in cracks, a compress is used - in this case, a cotton swab moistened with a 10% citric acid solution or a 3% hydrogen peroxide solution - applied to a darkened crack. The compress is aged until it is completely bleached.To prevent the solution from evaporating too quickly, the compress should be covered with cellophane or the entire product placed in a plastic bag.If the product was glued earlier, it must be dismantled after washing.
With a stream of boiling water directed at the place of the previous gluing, heat up the seam. After sufficient warming up, without applying great mechanical effort, try to separate the glued fragment. If this does not bring success, pour boiling water over the product and leave for a while. You can do this several times until the fragments easily separate from each other. Dismantling is carried out over a plastic basin with water, so that in case of an accidental fall, the product or its fragment does not break.
The fragments obtained after dismantling must be cleaned of old glue with a scalpel or a sharp knife. The glue heated with boiling water softens and should easily separate from the chips. If the adhesive is difficult to remove, you can use acetone or alcohol. To avoid damage to the glaze, it is best not to use numbered thinners, thinners, or strong acids. When the old glue is completely removed, stack the cleaned fragments to determine the order of the new gluing - small fragments are glued together first.
After degreasing the surfaces of the chips with alcohol or acetone, carefully coat the chip of a smaller fragment with glue.
The adhesive can be EPOXY GLUE, a two-component epoxy resin from BONDO, BIZON, or similar, in the worst case, a commonly available superglue can be used, the disadvantage of which is too fast "setting".
For a more accurate match of the fracture relief, the adhesive should be applied in a uniform, extremely thin layer. When the fragments are smeared with glue and tightly pressed against each other, fix the place of gluing with adhesive tape, plasticine, adhesive tape. In any case, even if it seems that the product is firmly glued, it should be left for a day to dry completely, since the "seizure" and complete polymerization of the glue are not at all the same thing. After you make sure that the gluing is completed, the fragments are held firmly, remove the glue that has come out along the seam with sliding movements of the scalpel.
If the fragments of the product are irretrievably lost, they can be made by yourself, but only if the thing is symmetrical or is a figure of rotation. Then, with a part similar to the lost fragment, first remove the mold with the help of base wax produced by the Kharkov plant of dental materials "STOMA" in the form of plates 170
The plate heated in hot (50-60 water) is applied to the preserved surface and pressed tightly. The plate should be larger than the fragment being restored, and go beyond its edges by about 10 mm. Carefully remove the cooled, hardened wax form and apply it to the lost area. Now, first fixing it around the edges with plasticine, proceed to casting the desired fragment.
Remove grease from the chipped surface, prepare a mass that consists of epoxy resin (binder) and dry white titanium or zinc pigment. Rub them until a porcelain-like viscous mass is formed. When pouring the mold, you must first try to cover the entire surface of the mold with this mass, and then gradually increase its thickness, accelerating from the center to the edges. It should be noted that pigments containing lime (for example, chalk) are not suitable for the preparation of a mass imitating porcelain. When the lost fragment is completely restored, process it with sandpaper, gradually moving from coarse grain to "zero". Sand the surface, taking care that the abrasive does not touch the edges of the original product. Now that the surface of the fragment is almost the same as the original, let's start toning the background.
For tinting, use acrylic white, clarifying the shades of white by adding watercolors. When choosing a shade, one should keep in mind the further preservation of the product with varnish, so the color should be half a tone lighter than the original. Ornaments or drawings on the lost fragments are also reproduced in watercolor and whitewash, since pure watercolor is too bright. At this stage of restoration, patience and good daylight are the main helpers, because the accuracy of color matching determines the quality of the restoration. It is not recommended to use oil paints for tinting, which can change color in the future. The process is completed by conservation, i.e. coating with dammar or acrylic lacquer by MAIMERI or similar, in one or more layers so that the gloss character of the coating completely coincides with the gloss of the original.
If small chips are found during the inspection of the product, it is necessary to carry out mastication, i.e. filling their volumes with an epoxy mass imitating porcelain, the recipe for which you learned above. In the same sequence, carry out grinding, tinting and conservation. Now the restored product can again decorate a sideboard, a slide or a home showcase. However, drinking tea from your mother's cup is still not worth it, now it belongs to family history. Food use for restored dishes is excluded - this can negate all your efforts and adversely affect your health.
| If, turning the product over, you see such signs on its bottom, be sure that you are really holding porcelain in your hands. | ||||
|---|---|---|---|---|
 Vienna, Austria) Vienna, Austria) |
 Maison (Germany) Maison (Germany) |
 Imperial Porcelain Factory Imperial Porcelain Factory |
 Gardner (Russia) Gardner (Russia) |
 Royal Manufactory (France) Royal Manufactory (France) |
 Kuznetsov's plant (Russia) Kuznetsov's plant (Russia) |
||||


